1700 KAWASAKI GENUINE ACCESSORIES EVALUATIONS

This is for general posts and questions concerning only the Kawasaki Vulcan Voyager 1700 V-Twin.

Moderators: the2knights, Highway Rider

Post Reply
1700Guy
Past Board Member
Past Board Member
Posts: 67
Joined: Sat Feb 16, 2008 4:12 am
16
Current bike(s): 2010 Voyager 1700
1982 Honda 500 Silverwing
1981 Honda CB900C
Location: United States
Has liked: 0
Been liked: 0
Contact:

1700 KAWASAKI GENUINE ACCESSORIES EVALUATIONS

Post by 1700Guy »

EVALUATION OF KAWASAKI GENUINE VOYAGER® ACCESSORIES

Kawasaki Motors Corp USA has asked me and David Roy to do an evaluation of three Kawasaki Genuine Voyager® Accessories that we did not have and also on the items that we had previously purchased. They then supplied the two of us with the items we picked that we did not have.

How I would like to do this is we will do our evaluations of all of our accessories, and then we will open it up to all others to add their input on their experiences installing accessories, as well as their thoughts on their likes and dislikes of their purchases. Kawasaki wants your input!

The first thing I would like to say is that all of the items I received and purchased were packaged very well, complete with instructions supplied with all items. And all items were very high in quality and workmanship, and installations fit well.

My evaluations have included more of what my thoughts were about the items, how long it took to install the items, and pictures of how it looks on the bike. David has definitely done an outstanding job with pictures of how the items were packaged, display of all of the components, and pictures of installation. I commend his thoroughness and diligence and how he presented his information.

Image

Image

Image

Image

Image
1700Guy
Past Board Member
Past Board Member
Posts: 67
Joined: Sat Feb 16, 2008 4:12 am
16
Current bike(s): 2010 Voyager 1700
1982 Honda 500 Silverwing
1981 Honda CB900C
Location: United States
Has liked: 0
Been liked: 0
Contact:

CB & AUDIO SYSTEM

Post by 1700Guy »

CB RADIO KIT: Installation Time: 2 hours
Part No.: K10400-037 $657.95

Rider Headset Connection Kit
Part No.: K 10400-036 $122.95

Passenger Headset Adaptor Cable
Part No.: K 10400-035 $ 76.95

Rider Communication Cable
Part No.: K 10400-027 $ 69.95

Helmet Speaker Kit
Part No.: K 10400-032 $ 67.95

Passenger Communication Kit
Part No.: K 10400-028 $159.95

Rider Entertainment Cable
Part No.: K 10400-034 $ 61.95


The CB was the first thing I added to the bike when I purchased it in March of 2010. I installed it with the help of my friend (I had just had back surgery). We followed the directions to the “t’, but it has been found since then that it is much easier to remove the left hand speaker instead of the whole front fairing to install the electrical connections. The install went very well. Everything fit perfectly and is made with top quality components.

The installation of all of the mics, speakers, and audio accessories took roughly 2 hours to complete. Again, this well-built, quality material is next to none. Two seasons and 31,000 miles later, it has been trouble-free and still looks like new.

For me, the CB and audio system are very important, especially the CB, when riding in groups, as our chapter, the Gem State Voyagers, does. It is also a very useful and critical tool for larger group rides such as at our AVA rally. The audio system and communication with the passenger are big plusses.

I highly recommend this system. It is a lot of money to put out, but it is worth it. The only item I would like to see Kawasaki change in this whole installation is the placement of the rider helmet cord plug-in. As you can see in the picture provided, I have moved mine to the rear of the chrome tank panel. As it comes, it is very awkward for the driver to unplug and plug the headpiece every time he or she dismounts the bike.

Image

Image
1700Guy
Past Board Member
Past Board Member
Posts: 67
Joined: Sat Feb 16, 2008 4:12 am
16
Current bike(s): 2010 Voyager 1700
1982 Honda 500 Silverwing
1981 Honda CB900C
Location: United States
Has liked: 0
Been liked: 0
Contact:

CB - Installation and Review - David Roy

Post by 1700Guy »

THE FOLLOWING CB EVALUATION IS BY DAVID ROY:

Installation and review of Kawasaki CB radio for the Voyager 1700

Today I installed the Genuine Kawasaki CB radio on my 2010 Voyager 1700. The box was a long narrow box to accommodate the CB antenna. I have laid out the parts required for this install in the photo below. The kit also came with the official Citizens Band Radio rules and regulations. My information below is meant to review and supplement the installation instructions, not replace them.

Image

For this install you have to gain access to the lower left fairing, the left side of the main fairing, the frame rail under the fuel tank, and the inside of the trunk. The most difficult part for me was carefully removing the trim ring around the ignition which is press fit into place. The only challenging part of this install was drilling holes in the rear of the trunk. It is best to have access to the service manual when working on the bike but it is pretty straight forward.

Below I removed the black cover and side cover for the lower fairing, then removed the fasteners holding the upper part of the lower fairing because this is were the CB unit will mount.

Image

The CB unit is mounted in this location with the fasteners provided. The connector needs to be routed into the main fairing and plugged into the mating connector located beside the radio. The instructions call for opening the fairing but based on information from others who have come before me and my own explorations into the upper fairing I decided it could be done by removing the left speaker to gain access to the mating plug.

Image

I still needed to get the CB plug into the fairing and the opening where one of the fairing frame rails entered was a little too small so I removed the fastener located near that frame rail and will able to pull the fairing enough to fit the CB plug through the gap and route it into the upper fairing.


Image

In the photo below you can see that I have routed the plug into the fairing and out the speaker opening just so you can see what it looks like.

Image

In the photo below you can see the plug which is now mated to its counterpart. This is a one hand operation but fortunately the mating plug is held securely by the fairing so it was not an issue. The antenna cable needs to be routed from the CB unit, under the fuel tank, and along the radio antenna into the trunk opening. The supplied zip ties help secure it along the route.

Image

Now for the fun part of drilling holes in the bike. I have drilled many holes in many bikes, but it is still something that I do not want to make a mistake at so it is a little stressful every time I do it. Kawasaki did supply a pretty cool template to help make this installation a little easier. Cut the template out, fold in the appropriate place and it follows the lines of the trunk to let you know exactly where the holes should be drilled.

Image

I do recommend checking with a square since you know the holes should be vertical and perpendicular to the rim of the trunk.

Image

The directions call for drilling a pilot hole from the inside so you know where to drill the larger hole from the outside of the trunk. I recommend using “green” tools to get the job done right. LOL!

Image

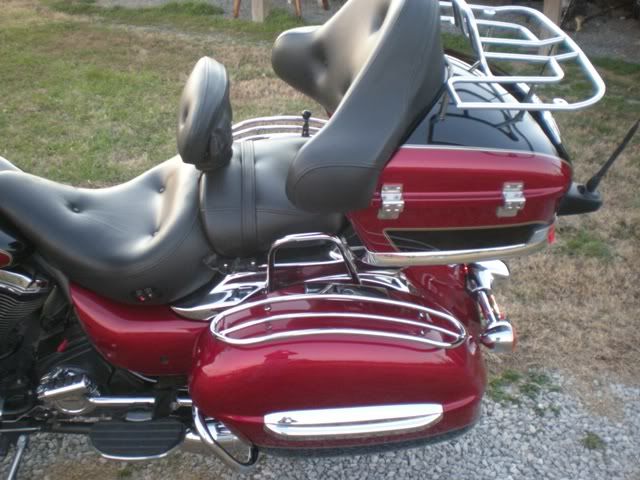
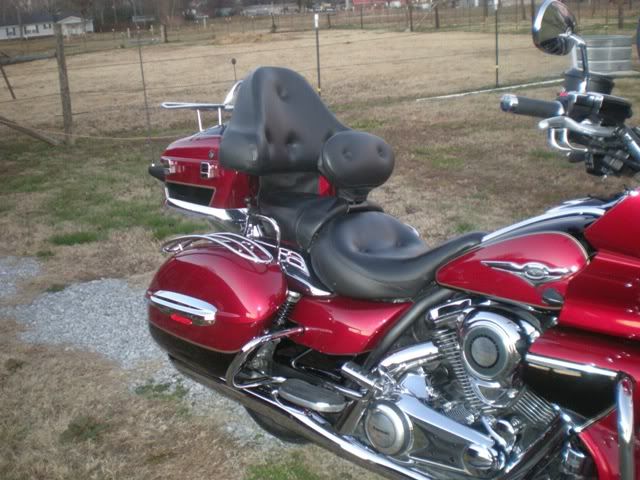
Here are some photos of my bike after a day of wrenching and modifying which is almost as fun and rewarding as riding.

Image


Image


The controls for the CB are already a part of the stock motorcycle and like the radio and intercom are very easy to use and operate. As of this writing I have not had the opportunity to use the CB to communicate with another rider. As soon as I do, I will report back with the results. I am using the Kawasaki Rider and Passenger communication headsets on my Voyager and they have some real nice features for the passenger where the passenger can control their radio and intercom volumes independent of each other and independent of the rider. Also the passenger has their own Push To Talk (PTT) button for communicating over the CB.

If you ride in groups and/or do a lot of traveling a CB is definitely a handy (some might say essential) communication device that keeps you connected and safe on the road. I am looking forward to using it soon.

NOTE: Most if not all installation instructions for Kawasaki Genuine Accessories can be downloaded in PDF from Kawasaki’s website. This will help you determine if the installation is something you want to tackle on your own or let the technicians at your local dealership perform the installation for you.
1700Guy
Past Board Member
Past Board Member
Posts: 67
Joined: Sat Feb 16, 2008 4:12 am
16
Current bike(s): 2010 Voyager 1700
1982 Honda 500 Silverwing
1981 Honda CB900C
Location: United States
Has liked: 0
Been liked: 0
Contact:

BACKREST - KAWASAKI GENUINE ACCESSORIES EVALUATIONS

Post by 1700Guy »

DRIVE BACKREST BRACKET KIT: Installation Time: 15 minutes
Part No.: K 53020-394 $299.95

DRIVER BACKREST PAD PILLOW-TOP
Part No.: K 53020-396 $189.95

I had the Grasshopper® backrest on at first, but I now have the Kawasaki Genuine® Accessories Backrest on. It was very easy to install and has high quality looks, finish, and workmanship. It is very well built.

The backrest is very adjustable vertically and horizontally, and is narrower at the bottom circumference spring loaded so it folds forward so it is easyed for the passenger to get on and off the bike.And has easy access to the passenger to a pouch on the backside This backrest gives some extra room to the passenger. I have always used a backrest, and, in my opinion, it is a “must” if you are putting a lot of miles in a day.

The only negative is that I feel that this should be a one-unit kit and pad, which might help lower the price.

Image

Image

Image
1700Guy
Past Board Member
Past Board Member
Posts: 67
Joined: Sat Feb 16, 2008 4:12 am
16
Current bike(s): 2010 Voyager 1700
1982 Honda 500 Silverwing
1981 Honda CB900C
Location: United States
Has liked: 0
Been liked: 0
Contact:

Front Fender Trim Evals

Post by 1700Guy »

Installation and Review of Kawasaki Front Fender Trim: David Roy

Today I installed the chrome front fender trim from Kawasaki Genuine Accessories.

I opened the box and dug out the layers of paper cushioning the part. First let me say that this is one beefy piece of chrome. The parts were wrapped well and protected just like I have come to expect from Kawasaki.

Image

I laid out the parts so you can see that this is definitely a DIY project for those with even minimal mechanical skills. The quality of the chrome looks real nice. I couldn’t find any flaws at all.

Image


The instructions were clear and easy to follow. Below you can see that the rubber grommets and fork tube bumpers are installed. Now I just need to loosen up the fender and finish the installation.

Image

I own a set of ratcheting box end wrenches so I was able to loosen the fender without removing the front wheel.

They really help with hard to reach places that don’t require a lot of torque.

Following Kawasaki’s instructions I applied blue masking tape to the fender to protect the finish while I worked.

Image

Image

Below you see that I have slid the fender forward on the wheel so I could install the bracket onto the fender. It just slips on and the rubber grommets and bumper protect the surfaces it comes into contact with.

Now that the bracket is in place you just slide the fender back into place and fasten it back to the forks. Make sure you remember to put the brake hose bracket back in place before you insert the fasteners.

Now I am ready to mount the chrome trim to the brackets. This is where I ran into one slight issue during the installation. I like to start all of my fasteners by hand and make sure everything is going smoothly before putting a tool on the fastener. The threads on the bracket were a little rough so I could not start the fastener by hand. What I ended up doing was using my hex socket with an extension to line up the fastener and get it started before attaching the socket wrench. Not a big deal really, but if done wrong you do risk cross threading the fastener.

Here is the finished installation. It really looks nice on my bike and beefs up the front end of the bike. I am hoping it also provides some protection from pebbles as well as looking awesome. One suggestion I would make to Kawasaki would be to move the decal on the ABS bikes a little closer to the forks so it doesn’t get partially covered.

Image

Image

I would definitely recommend this accessory to those who want to add some shine and possibly protection to their front fender.

NOTE: The instructions that come with various Kawasaki Genuine Accessories do reference the service manual for removal and installation of parts of the bike necessary to install the accessories.
1700Guy
Past Board Member
Past Board Member
Posts: 67
Joined: Sat Feb 16, 2008 4:12 am
16
Current bike(s): 2010 Voyager 1700
1982 Honda 500 Silverwing
1981 Honda CB900C
Location: United States
Has liked: 0
Been liked: 0
Contact:

Front Fender Trim #2

Post by 1700Guy »

FRONT FENDER TRIM: Installation Time: 30 minutes
Part No.: K 53020-186 $252.95

You need to be patient and take your time. This is very well built and looks great, too! This piece of chrome adds a lot of class to the front fender. When I installed it, I did not take off the front tire as directions said. There was still plenty of room to put the front fender trim on.

Image
1700Guy
Past Board Member
Past Board Member
Posts: 67
Joined: Sat Feb 16, 2008 4:12 am
16
Current bike(s): 2010 Voyager 1700
1982 Honda 500 Silverwing
1981 Honda CB900C
Location: United States
Has liked: 0
Been liked: 0
Contact:

SADDLEBAG CHROME TOP TRIM - David Roy

Post by 1700Guy »

Installation and Review of Saddlebag Chrome Top Rails

Today I installed the Saddlebag Chrome Top Rails on my 2010 Voyager 1700. Like all the Genuine Kawasaki Accessories I have ordered in the past the parts were well packaged to protect the contents.

In this photo I have laid out all the parts that came with the rails. Now for this installation you will need to drill holes in your saddlebag lids so if you are faint of heart or don’t want the responsibility of measuring and laying out the locations where the holes will be drilled you might want to let the dealer handle this installation. The quality and shine of the chrome was very good. No smudges, or imperfections of any kind on the parts I received.

Image

The instructions were very clear regarding the layout, but you will need a metric measuring tape since the measurements are in millimeters. Holding the rails steady on the saddlebag while drawing a circle around the posts can be challenging. A second set of hands would be helpful. The instructions call for a 9/32 drill bit which is a little larger than the ¼ inch drill bit that is the largest drill bit in most basic bit sets so make sure you have one handy prior to starting your project.

Image

I will say that drilling holes on the saddlebag lids was definitely worth it. The rails look real good on the bike. In the photos below I still have the Nomad backrest on the bike so you can see what the rails would look like installed on your Nomad.

Image


Image


Image


Below is a photo of the Voyager with the Trunk re-installed.

Image

I definitely recommend the Kawasaki Saddlebag Top Rails. They add some shine to the bike while helping protect your paint from potential scuffs. Some people might just consider chrome as ‘bling’, but I also consider chrome as an added safety measure when out on the streets. The way the sun shines off the chrome drivers just can’t help noticing you.
1700Guy
Past Board Member
Past Board Member
Posts: 67
Joined: Sat Feb 16, 2008 4:12 am
16
Current bike(s): 2010 Voyager 1700
1982 Honda 500 Silverwing
1981 Honda CB900C
Location: United States
Has liked: 0
Been liked: 0
Contact:

Saddlebag Side Trim

Post by 1700Guy »

SADDLEBAG SIDE TRIM: Installation Time: 20 minutes
Part No.: K 53020-184 $263.95

Easy to install. Good fit and finish. This trim really adds greatly to the looks of the saddlebag and matches very well wit the top saddlebag trim. Also, in the directions it said that the trim rails need to be removed for wheel removal. If you use a lift and center jack and pull the tire out from under the bike, I cannot see this as an issue.

Image

Image
1700Guy
Past Board Member
Past Board Member
Posts: 67
Joined: Sat Feb 16, 2008 4:12 am
16
Current bike(s): 2010 Voyager 1700
1982 Honda 500 Silverwing
1981 Honda CB900C
Location: United States
Has liked: 0
Been liked: 0
Contact:

Saddlebag Top Trim

Post by 1700Guy »

SADDLEBAG TOP TRIM: Installation Time: 30 minutes
Part No.: K 53020-185 $273.95

You need to follow instructions and make sure you have it positioned properly before drilling holes. Take your time.

It looks great, but it also helps in keeping passenger from dragging their feet over the top of the saddlebag.


Image
1700Guy
Past Board Member
Past Board Member
Posts: 67
Joined: Sat Feb 16, 2008 4:12 am
16
Current bike(s): 2010 Voyager 1700
1982 Honda 500 Silverwing
1981 Honda CB900C
Location: United States
Has liked: 0
Been liked: 0
Contact:

Mini Air Pump

Post by 1700Guy »

MINI AIR PUMP:
Part No.: K 56019-029A $57.98

This is a very good pump for your air-assist suspension. I have owned a few, and this is the best one I have ever owned.

Image
1700Guy
Past Board Member
Past Board Member
Posts: 67
Joined: Sat Feb 16, 2008 4:12 am
16
Current bike(s): 2010 Voyager 1700
1982 Honda 500 Silverwing
1981 Honda CB900C
Location: United States
Has liked: 0
Been liked: 0
Contact:

Front Brake Caliper Cover

Post by 1700Guy »

FRONT BRAKE CALIPER COVER: Installation Time: 5 minutes
Part No.: K 53020-371 $79.95

This is very easy to install and looks real sharp. Read the directions. Surface must be clean. This caliper cover adds a simple piece of “bling” to front of the bike.


Image
1700Guy
Past Board Member
Past Board Member
Posts: 67
Joined: Sat Feb 16, 2008 4:12 am
16
Current bike(s): 2010 Voyager 1700
1982 Honda 500 Silverwing
1981 Honda CB900C
Location: United States
Has liked: 0
Been liked: 0
Contact:

TRUNK LINER SET

Post by 1700Guy »

SADDLEBAG LINER SET: Installation Time: N/A
Part No.: K 99994-973A $104.95

If you travel overnight or longer, these bags are very helpful and fit into the saddlebags very well. These are high quality bags. I use mine whenever I travel, whether by bike, car, or air. These are very useful accessories.

Image

Image
1700Guy
Past Board Member
Past Board Member
Posts: 67
Joined: Sat Feb 16, 2008 4:12 am
16
Current bike(s): 2010 Voyager 1700
1982 Honda 500 Silverwing
1981 Honda CB900C
Location: United States
Has liked: 0
Been liked: 0
Contact:

Pillow Top Passenger Backrest

Post by 1700Guy »

PILLOW TOP TRUNK BACKREST PAD: Installation Time: 15 minutes
Part No.: K 53001-231 $115.95

When we first got our Voyager 1700, we had the stock backrest, which was much too short for my back. Duane ordered the pillow top trunk backrest, which is four (4) inches higher than the stock backrest. It is incredible! The stock backrest was uncomfortable for me and made me feel as if I were being pushed forward into the driver. It also hit my back at a very bad spot, and I did not feel as if I had much back support at all. This new backrest is “just right!” I love it! This backrest, along with the comfy stock seat makes my ride very comfortable, and I feel safe and stable as a passenger.

Image
User avatar
David (N. Alabama)
Elite Tourer
Elite Tourer
Posts: 816
Joined: Thu Feb 21, 2008 1:20 pm
16
Current bike(s): 2007 Kawasaki Mean Streak
2010 Kawasaki Vulcan Voyager 1700
2011 Kawasaki Versys
2012 Kawasaki KLX250S
2010 Moto Guzzi V7 Café Classic
1975 Kawasaki KT250 Trials
2014 Triumph Trophy SE
Location: Tennessee
Has liked: 0
Been liked: 0

Re: KAWASAKI GENUINE ACCESSORIES EVALUATIONS

Post by David (N. Alabama) »

Kawasaki Dark Tint Wind Deflector K99994-0176

Image


I love the way the wind deflector looks on the bike. It is great for warm weather riding around town and and country back roads.


For me there is a little too much wind at speeds above 55 MPH.


The nice thing about the deflector is that I can wrap it in fleece and store it in my saddlebag. I can travel with a taller windshield and then swap it out for local riding. Definitely nice when it is warm out.


I carry a hex socket and thumb ratchet to make changing the shields a quick job.
2010 Voyager 1700
Image
User avatar
David (N. Alabama)
Elite Tourer
Elite Tourer
Posts: 816
Joined: Thu Feb 21, 2008 1:20 pm
16
Current bike(s): 2007 Kawasaki Mean Streak
2010 Kawasaki Vulcan Voyager 1700
2011 Kawasaki Versys
2012 Kawasaki KLX250S
2010 Moto Guzzi V7 Café Classic
1975 Kawasaki KT250 Trials
2014 Triumph Trophy SE
Location: Tennessee
Has liked: 0
Been liked: 0

Re: KAWASAKI GENUINE ACCESSORIES EVALUATIONS

Post by David (N. Alabama) »

Kawasaki Pillow Top Heated Seats K53001-233 Rider and K53001-234 Passenger. Also Pillow Top Tall Passenger Backrest K53001-231 The Voyager and the Nomad both take the same seats and backrests. You can even put the Voyager trunk on the Nomad or Nomad backrest on the Voyager.

Image

The heated seats were puchased with the Voyager. My wife and I had just come from test riding a new Goldwing that was equipped with heated seats. We test rode the Voyager and knew it was the bike for us. The only question my wife asked was "can we get heated seats with this bike?" I looked at the dealer and he scrambled to get the accessory book. We ordered the heated seats and the tall pillowtop passenger backrest. This is the first bike I have owned where my wife actually asks me to take her for a ride.

Installing the seats was a breeze. Kawasaki already has accessory connectors under the seat where you attach the quick release connector for the seat. The passenger seat then connects to the driver seat.

The controls for both the driver and passenger seat are located on the left side of the driver seat. There are two different temperature settings and on high the heat will penetrate the thickest riding gear.

I have ridden all day with temps in the low 40s and was very thankful for those seats.

My wife also loves the extra support the tall passenger backrest provides. The backrest has some type of vibration dampening system on it also. My pretty bride says this bike is just as comfortable as the Goldwing we test rode and way better looking.
2010 Voyager 1700
Image
User avatar
David (N. Alabama)
Elite Tourer
Elite Tourer
Posts: 816
Joined: Thu Feb 21, 2008 1:20 pm
16
Current bike(s): 2007 Kawasaki Mean Streak
2010 Kawasaki Vulcan Voyager 1700
2011 Kawasaki Versys
2012 Kawasaki KLX250S
2010 Moto Guzzi V7 Café Classic
1975 Kawasaki KT250 Trials
2014 Triumph Trophy SE
Location: Tennessee
Has liked: 0
Been liked: 0

Re: KAWASAKI GENUINE ACCESSORIES EVALUATIONS

Post by David (N. Alabama) »

Pillowtop Gel seats. K53001-217 Driver and K53001-218 Passenger. You can get both of these seats for MSRP of under $275. Definitely a bargain.

I bought the Gel seats because I know I am going to put over 100,000 miles on this bike and didn't want to wear out the heated seats during summer riding, but wanted more support than the stock seats offer as well as matching the Rider and Passenger backrests.

The Gel seats look just like the heated seats in my previous post without the heat controls of course. The Gel seats offer firmer support than the stock seat for all day riding. They do sit you up an inch or so higher than the stock seats which for me means a little more leg room and not stretching to see over the stock windscreen.

One thing I did to make it easier to switch out seats was to order extra rubber stoppers for the bottom of the seats.
2010 Voyager 1700
Image
User avatar
David (N. Alabama)
Elite Tourer
Elite Tourer
Posts: 816
Joined: Thu Feb 21, 2008 1:20 pm
16
Current bike(s): 2007 Kawasaki Mean Streak
2010 Kawasaki Vulcan Voyager 1700
2011 Kawasaki Versys
2012 Kawasaki KLX250S
2010 Moto Guzzi V7 Café Classic
1975 Kawasaki KT250 Trials
2014 Triumph Trophy SE
Location: Tennessee
Has liked: 0
Been liked: 0

Re: KAWASAKI GENUINE ACCESSORIES EVALUATIONS

Post by David (N. Alabama) »

Kawasaki Rider Backrest K53020-394 and K53020-396 for the pillowtop pad

Image

The Rider backrest installs to the bottom of the passenger seat and is adjustable up and down as well as back and forth. Some consider the backrest expensive compared to other backrests on the market, but this backrest not only takes rider comfort into consideration, but passenger safety.

The backrest is well padded on the back side to protect the passenger and also folds forward so that it does not trap the passenger in case of a mishap.

My wife says that this backrest does not get in the way for her comfort on the bike like the Grasshopper backrest did.
2010 Voyager 1700
Image
User avatar
David (N. Alabama)
Elite Tourer
Elite Tourer
Posts: 816
Joined: Thu Feb 21, 2008 1:20 pm
16
Current bike(s): 2007 Kawasaki Mean Streak
2010 Kawasaki Vulcan Voyager 1700
2011 Kawasaki Versys
2012 Kawasaki KLX250S
2010 Moto Guzzi V7 Café Classic
1975 Kawasaki KT250 Trials
2014 Triumph Trophy SE
Location: Tennessee
Has liked: 0
Been liked: 0

Re: KAWASAKI GENUINE ACCESSORIES EVALUATIONS

Post by David (N. Alabama) »

Today I had a chance to ride 200 miles with a friend that has a CB on his bike. The CB on the Voyager worked flawlessly. It was like we were sitting across from each other in a restaurant. Now I wish I would have added a CB years ago. We used to have to pull over to discuss changes in the route or where we wanted to stop to eat. We used to wait until we stopped to say; "did you see (this or that) 20 miles back?"

Now I just hit a button and instant communication. Awesome. The radio automatically mutes when you are talking or listening to someone else on the CB.

Definitely recommend getting a CB if you ride with others.
2010 Voyager 1700
Image
User avatar
Me Again
King of the Road
King of the Road
Posts: 1747
Joined: Sun Feb 24, 2008 4:27 am
16
Current bike(s): 1988 1300 Voyager
Location: Wisconsin
Has liked: 0
Been liked: 219 times

Re: KAWASAKI GENUINE ACCESSORIES EVALUATIONS

Post by Me Again »

Anyone got an install of those rear speakers?
User avatar
TheAudiDoc
Traveler
Traveler
Posts: 112
Joined: Fri Aug 28, 2009 12:55 pm
14
Current bike(s): 2015 Harley Ultra Limited
2009 VV1700 SOLD
Has liked: 0
Been liked: 0

Re: KAWASAKI GENUINE ACCESSORIES EVALUATIONS

Post by TheAudiDoc »

i did the rear speakers in under an hour....easy and sound good :thmup:
Work hard.....Ride Harder!
Mike Pisarski , Tecumseh, MI
2015 Harley Ultra Limited
2009 Voyager Silver/Black Sold
2010 & 2011 Showdown 1st Place
It's A U D I
Post Reply

Return to “General - Voyager 1700 V-Twin”