OK I'm done.
I'm going to go through what I went through first and then I'll give my opinion on what NOT to do in this situation.
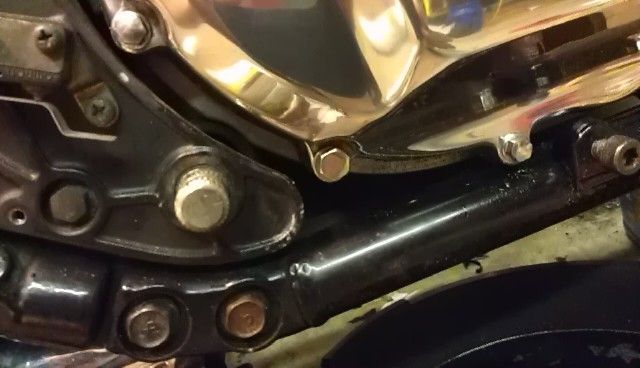
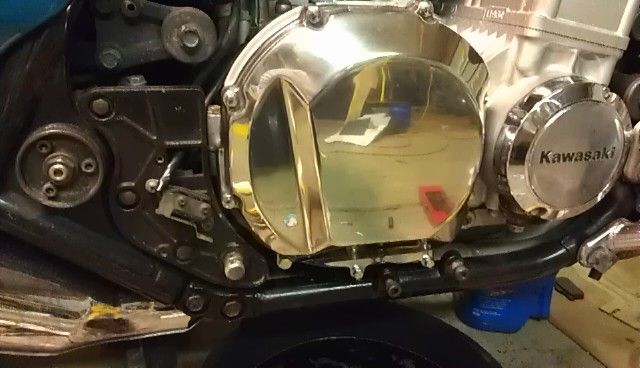
I pulled the clutch cover because:
1) I wanted to see if my springs were broken, they weren't.
2) I wanted to see how clean the motor was, it was perfect.
3) I wanted to polish the cover, I could have did this on the bike.
So, in other words I didn't have to pull the cover at all. My first mistake. When I started removing the screws they would snap and come loose, no anti-seize and too tight. So when I broke my first one I thought at any moment it was going to snap and come loose, it broke, once that happened I had to remove the cover and another screw broke in the process.
My first instinct was to put a collar on the remaining stud and drill the cover hole out and put the broken screw back in, oh how your first instincts are always right. But I thought I could get this screw out, my second mistake.
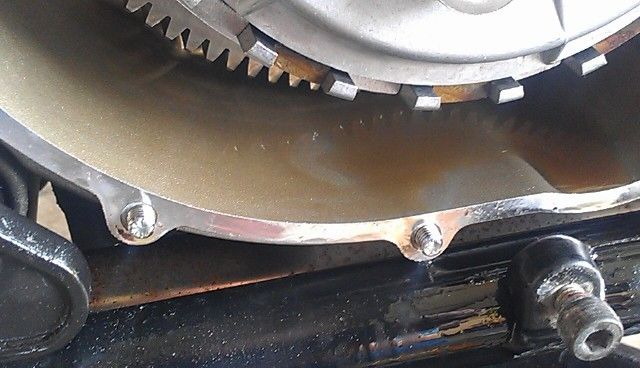
Armed with drills, liquid wrench, butane torch and easy outs I started. It drilled pretty well and the extractor grabbed pretty well but the butane torch could not get it hot enough. The aluminum dissipated the heat too fast and just wouldn't cut it. So a little pressure was used, a little too much and the extractor broke off. My third mistake. Back to Menards for all kinds of implements of destruction. Drills were useless, the only thing I found that only half way worked were small grinding stones for a dremel, the blue ones. As I worked slipping off made the hole in the aluminum larger and larger. Still not getting anywhere I bit the big one and paid $45 for a Rescue Bit. It started out fine, maybe my drill was too fast I had it on the lowest setting, but it started out great for about 2 mins then dulled and I got nothing more from it. It had 2 sides so I flipped it over and being even more careful after 2 more minutes the same thing. In the mean time this thing would go through aluminum like hot butter and my hole was now really big. My fourth mistake. Back to the grinding stone. I finally got it down to just a little tip of the extractor it would even spin when you were grinding on it. But it was not coming out. So I drilled beside it and used the Rescue Bit to grind at the side of it, after the Bit broke 4 times it was finally gone.
That only left drilling out the screw and re tapping the hole. By the time I was done there wasn't much left of the screw or the aluminum. I never really got the screw out, it beat me at every turn. I put the cover on and as a guide drilled and tapped the hole. It was too far gone by this time and was not going to hold. Not even with a longer screw. These actually go all the way through and come out the back. So I put anti seize on the screw put it in the hole filled the hole with J B Weld and let it sit. I turned the screw out and it looked pretty good. A gave it another day to cure and re tapped the hole. Bought a longer SS screw put Loctite on it and hoped for the best. It tightened down.
The other screw, I did what I should have done in the first place and took a screw connector and ground it down in a cylinder shape so it would fit in an 11/32 hole, drilled out the cover hole, ground down the broken screw and inserted it right back in. Too easy.
So this is what I've learned, steel bolt in aluminum:
1) Make sure you really need to do this.
2) If you feel it's going to break, STOP let a pro do it. They have real torches.
3) If you can't afford to have them do it and it breaks don't try to extract it. Use reverse drill bits, center the bit and drill it out. Then tap it.
4) If you didn't read this and get into the mess that I did, just keep grinding and grinding. It will come out in a month or so.
5) Don't waste your money on tools that promise the world. Just keep grinding.
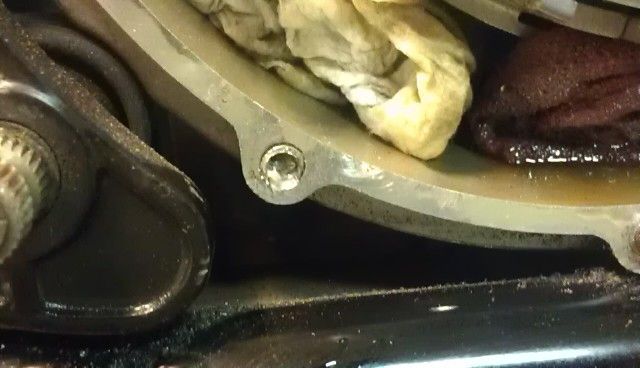
While I was down there grinding away I looked up and seen this:
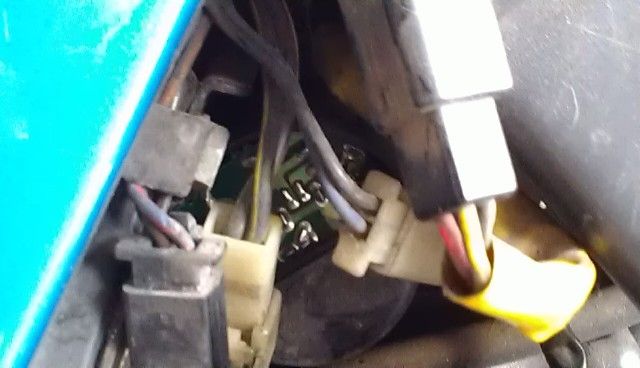
This is the fuel pump with nothing covering the circuit board. I will never get done with just the maintenance on this bike. The motor was in great shape but nothing else was maintained at all. At this point maybe June.


 Gene
Gene


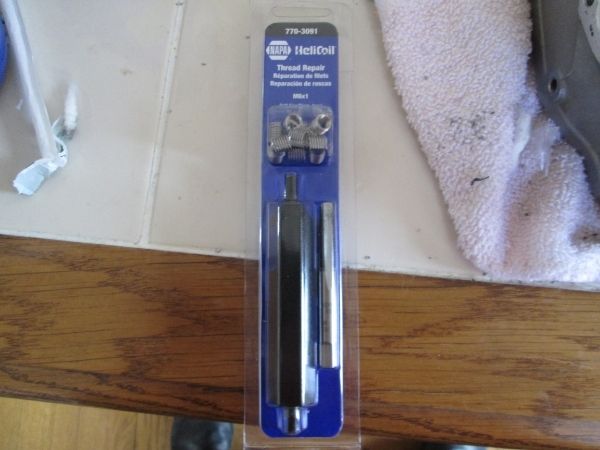 Comes with a tap and a nice guide tool.
 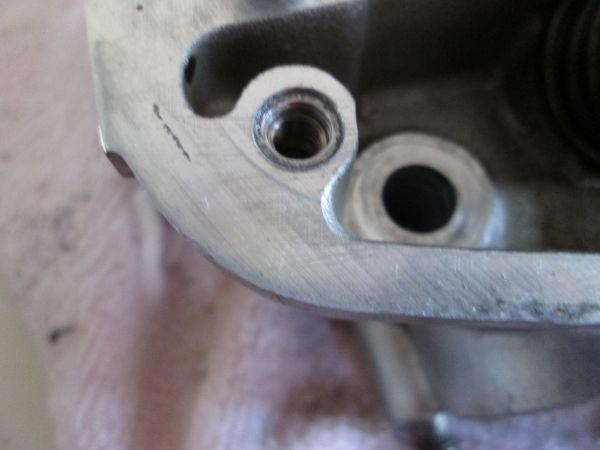 Just like new again, with these you should have no fear of anything ever again.......